DIY projects like installing skirting board covers enhances skills, save cost, and instills creativity. The outcome will also bring personal satisfaction. However, you must do it accurately with the best precision. That’s where the problem comes in because you must select the right tools, prepare the surface, choose the most suitable adhesive, time the curing, and ensure aesthetics. This installation guide details the tips for applying glue on skirting board covers and proper installation.
Table of Contents
Gather Your Materials
Start by assembling the tools and equipment you will need for the projects. Doing this will help you work efficiently and achieve precise results. You will gather the following:
- Skirting boards cut to sizes
- Adhesives
- Caulking gun to dispense the adhesive
- Utility knife to cut when needed
- Measuring tape
- Pencil
- Level
Having these materials before you start working reduces frustrations and ensures a quality outcome. It will help if you consult a professional to guide you on the tools and materials you need so that your project stays active once you start it.
Prepare The Surface
The next step is preparing the surface to enhance adhesive bonding and ensure aesthetic finish. Prepping the wall also enhances the protective solutions’ longevity. To do so, use a damp cloth to clean the surface before allowing it to dry. You will then repair any damages on the wall or remove obstacles that can interfere with your installation. You should also ensure the walls are level using a level. If the level is higher, you will adjust by sanding or shimming the uneven areas.
Measure & Cut
Measuring and cutting the skirting boards will be your next step. This process makes the installation easy, ensures proper fit, and enhances the aesthetic appeal. You should measure twice(double-check) for the best result and cut once. Use a straight edge when cutting. Doing so will help create a precise guideline. It will help to cut longer if uncertain as you can reduce it if need be and not vice versa. Ensure the blade you use is sharp enough to avoid jagged edges.
Apply The Adhesive
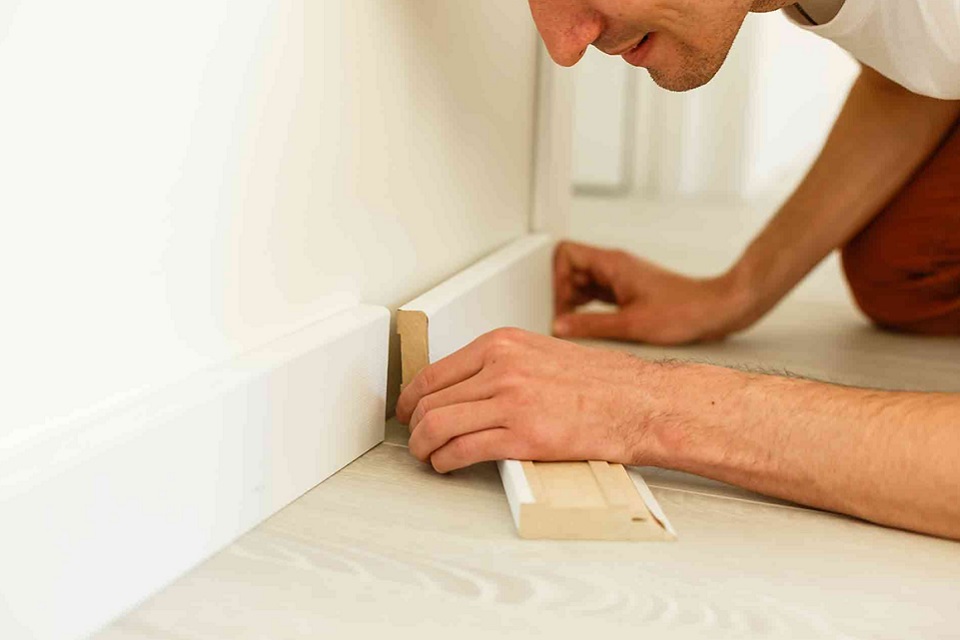
Proper glue on skirting board covers is critical as it ensures a secure bond, durability, and aesthetic appeal. Well-applied adhesives also reduce maintenance frequency. The proper adhesive selection by checking the manufacturer’s recommendation is one of the best ways to go about it. It would help if you also used the caulking gun, following the user manual and cutting the nozzle tip at 45 degrees for easy control of the adhesives. Additionally, you should apply a continuous bead along the skirting board’s back. The dot should be of the same size to achieve consistent thickness.
Press It To Stick
Press to stick as it secures the adhesion. Doing so also eliminates air gaps and will give you a professional finish. While at it, ensure proper alignment and apply even pressure along the entire length. You can use your hands or a soft mallet for this process. Start from the center, working towards the edges, which will help in adhesive distribution.
Conclusion
A perfectly executed DIY project is satisfying. However, you must follow the proper guidelines to ensure that. Doing so can be challenging if you are new to these projects. Thankfully, this installation guide will help you. Use the information to make your skirting board cover installation seamless.
Author
Nellie Heaton


No Comments